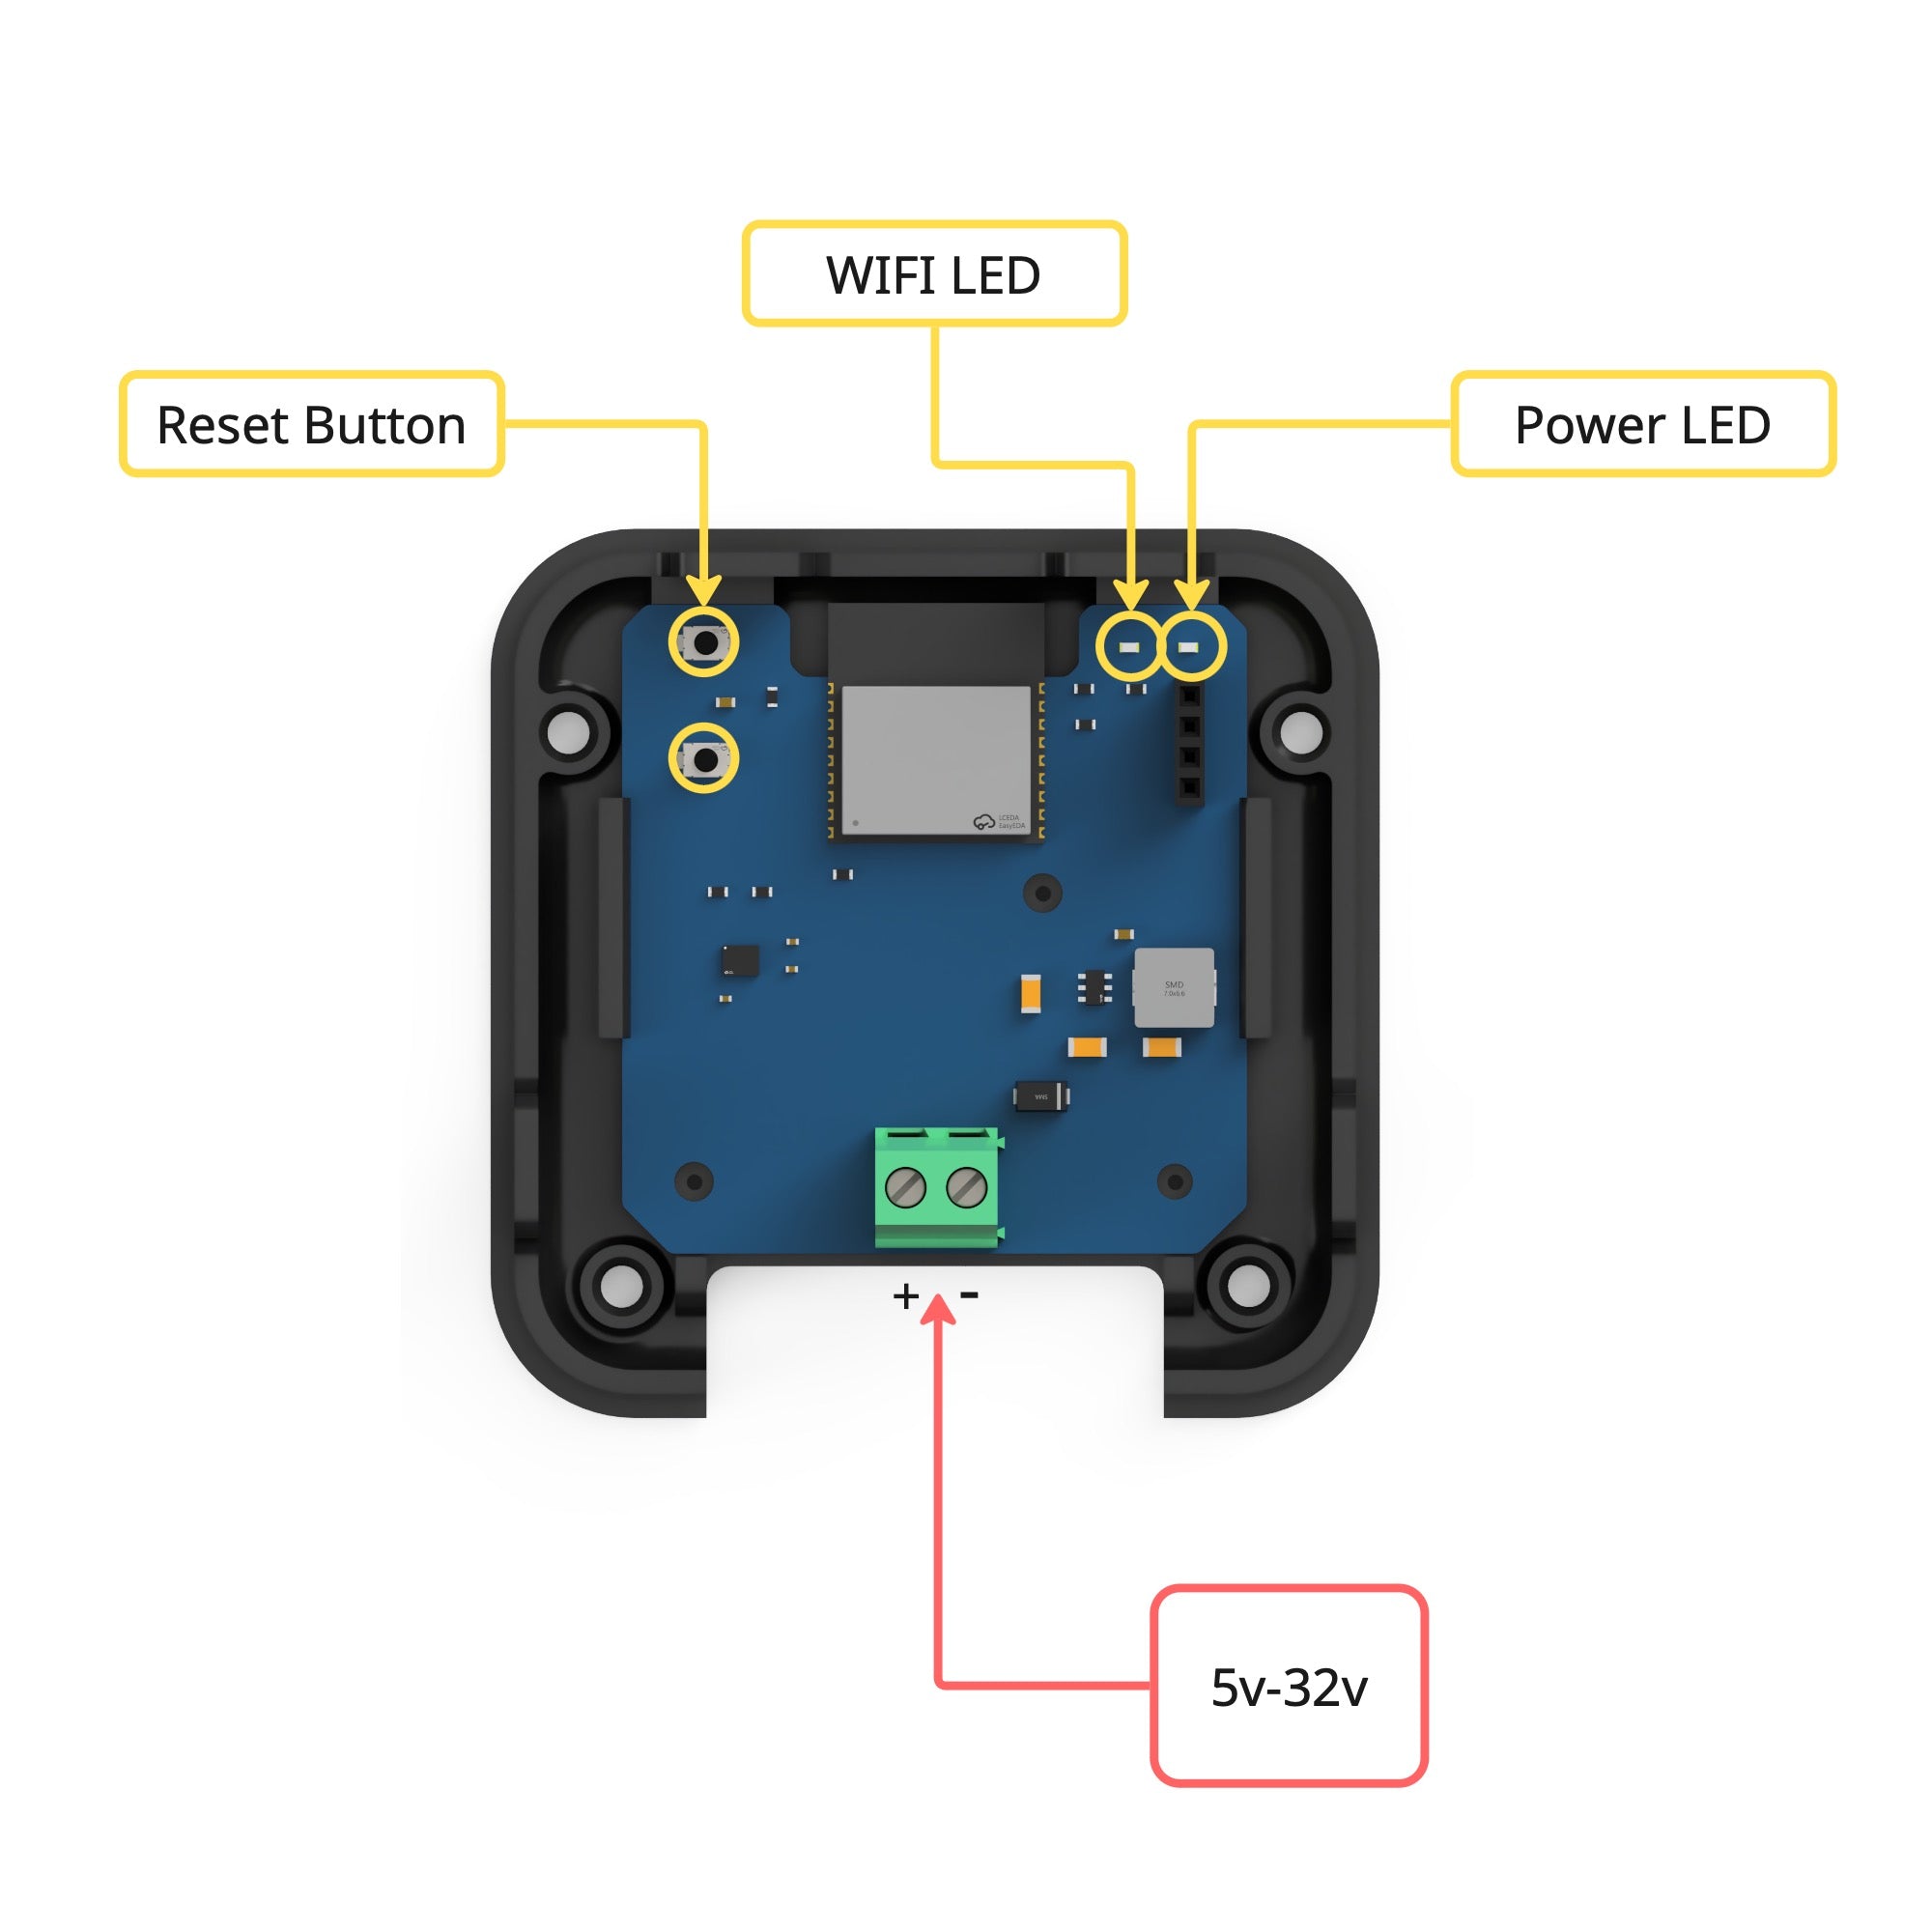
Powering the device
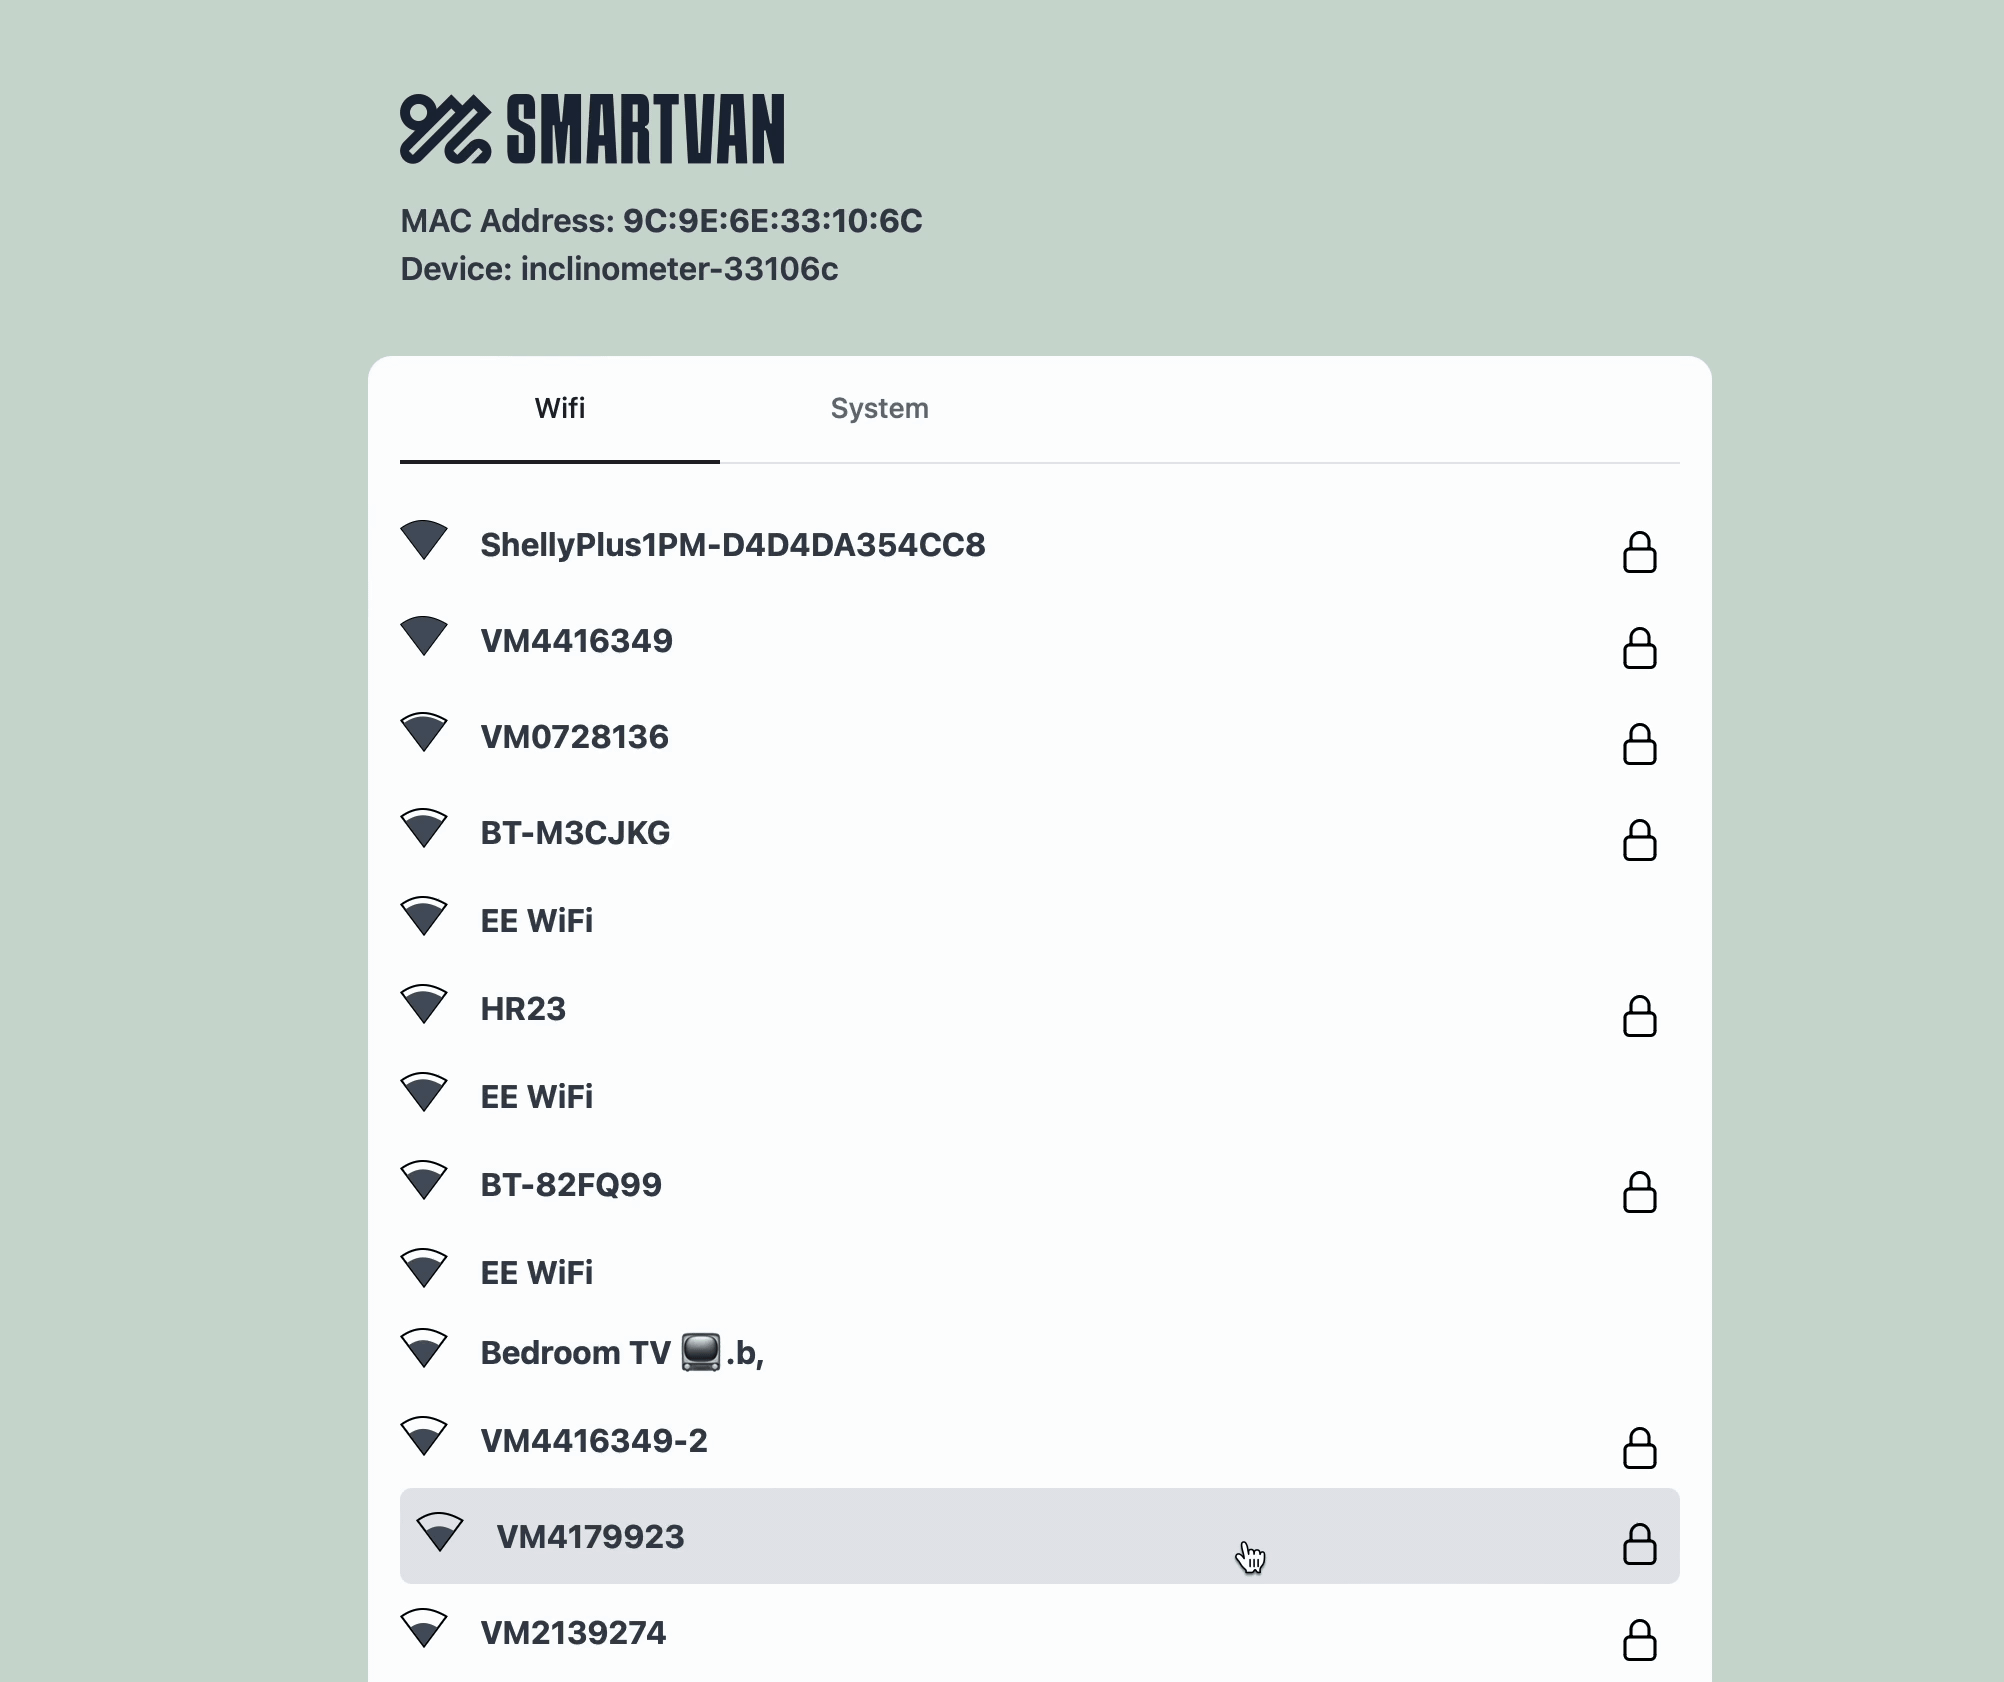
Configuring Wifi
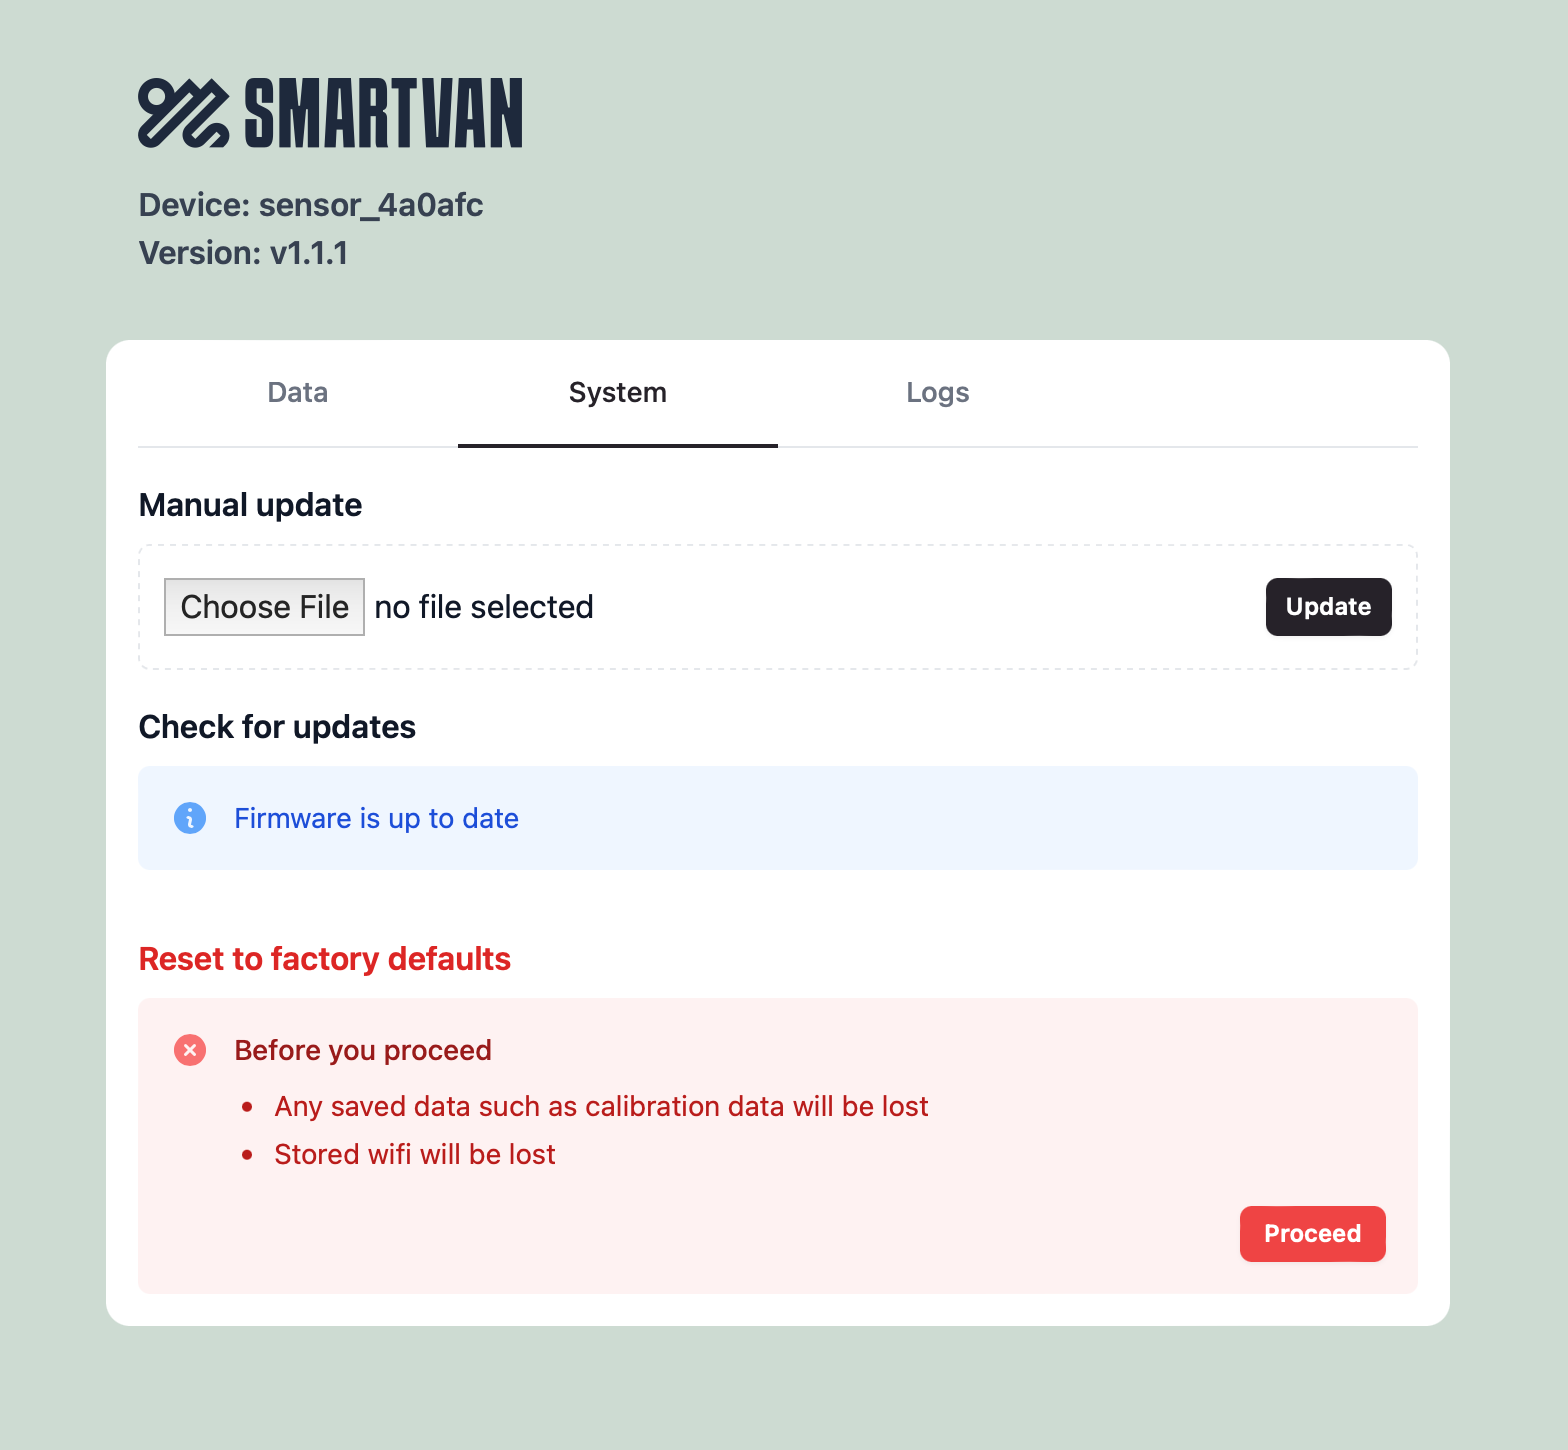
Check for updates
Adopting Device in HomeAssistant
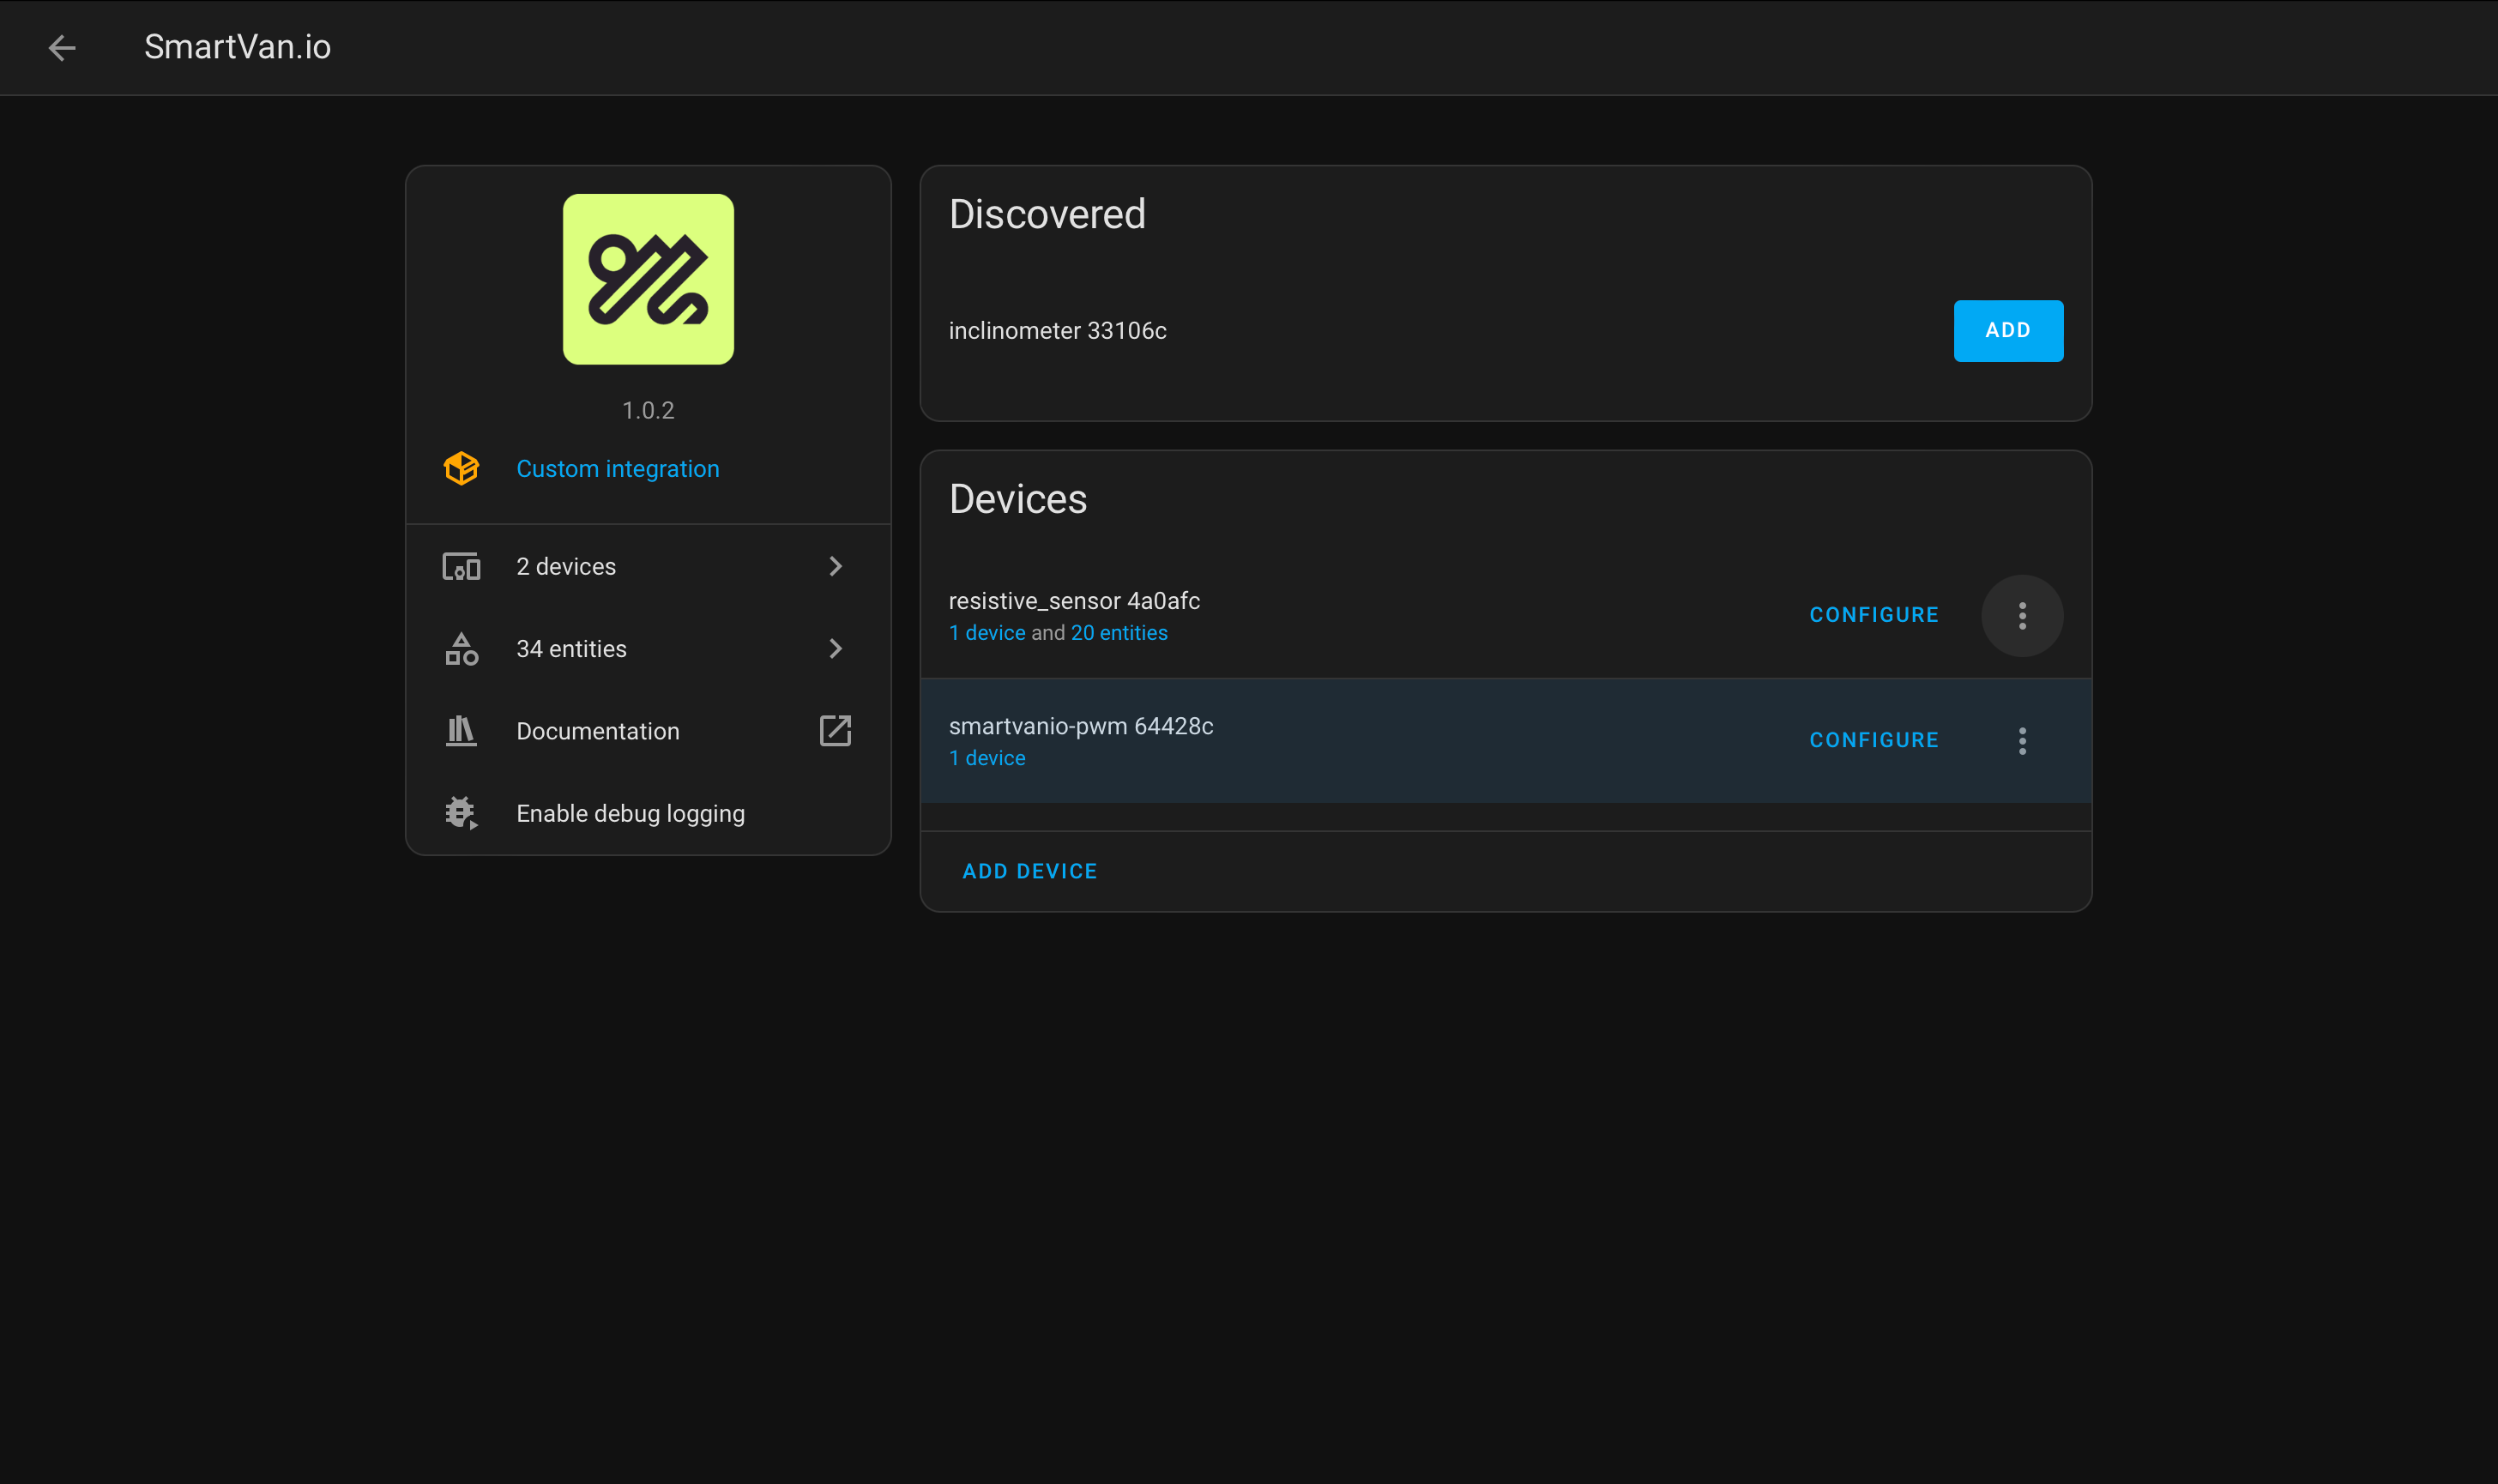
In order for the device to be discovered in HomeAssistant you must first install the SmartVan.io integration

Automatic Discovery
- Home Assistant will detect the device on the network and notify you that it is available for adoption.
- Open the Notifications section from the sidebar.
- Click Check it out, which will take you to the Devices & Services page.
- Locate the device under Discovered, then click Configure.
- In the dialog, click Submit.
- You will be prompted to assign the device to an area—choose any location you prefer.
Manual Adoption
- Go to Settings > Devices & Services.
- Click Add Integration (bottom right corner).
- Search for SmartVan.
- In the Host field, enter the ip address or hostname of your device and click Submit.
- Assign the device to an area of your choice.
Installing custom card
Using HACS (Recommended)
- Ensure you have HACS (Home Assistant Community Store) installed.
- Click on the install link below
Manual Installation
- Download the card files from the provided link.
- Place them in your Home Assistant
wwwfolder. - Add a reference to the card in
lovelaceresources.

Adding the custom card to your dashboard
Config paramaters
Enable
- Toggle Inclinometer
-
Pitch
- Adjusted Pitch Angle
-
- Actual Pitch Angle
-
Roll
- Adjusted Roll Angle
-
- Actual Roll Angle
-
Calibrate Pitch
- Calibrate pitch
-
- Reset Pitch Calibration
-
- Pitch adjustment angle
-
Calibrate Roll
- Calibrate Roll
-
- Reset Roll Calibration
-
- Roll Adjustment Angle
-
Orientation
- Orientation
-
Option 1 - Flat
 Option 2 - Upright
 Option 3- Upright Sideways
 Option 4 - Flat Sideways


